
AI - Happy Face Detection
Our Happy Face Detection project uses AI to analyze facial expressions and identify emotions, particularly happiness. Built with Python and deep learning frameworks like TensorFlow and Keras, this solution applies advanced technologies such as DeepFace and MTCNN for accurate emotion recognition.
Technologies Used
- Python
- TensorFlow / Keras
- DeepFace (VGG-Face, OpenCV)
- OpenCV for face detection
- NumPy, Pandas
In this comprehensive guide, we will walk you through building your own Happy Face Detection AI from scratch. The process includes setting up the environment, enhancing image quality, detecting faces, and analyzing emotions using deep learning models. With Python, OpenCV, and TensorFlow, you'll create a robust system capable of accurately identifying happy faces.
Why Build This AI?
The AI has several real-world uses, such as:
- Mental Health & Well-being Monitoring – Mood tracking apps, therapy support
- Customer Experience & Engagement – Retail satisfaction analysis, chatbot responses
- Education & E-Learning – Student engagement detection in online learning
- Marketing & Advertising – Audience reaction analysis, ad effectiveness testing
- Smart Surveillance & Security – Unusual behavior detection in public spaces
Let's Build It
Import Necessary Libraries
- cv2 (OpenCV): Used for image processing and face detection.
- NumPy: Handles numerical operations on image data.
- Matplotlib: Displays images in the Colab notebook.
- DeepFace: Performs facial analysis, including emotion detection.
- Google Colab Files: Allows users to upload images for analysis.
- PIL (Pillow): Enhances image quality before processing.
- MTCNN: A deep learning-based face detection model that improves accuracy.
# Install required libraries
!pip install opencv-python deepface tensorflow mtcnn numpy

# Import necessary libraries
import cv2
import numpy as np
import matplotlib.pyplot as plt
from deepface import DeepFace
from google.colab import files
from PIL import Image, ImageEnhance
from mtcnn import MTCNN
Upload and Load the Image
- Uses files.upload(): Allows users to upload an image from their local device in Google Colab.
- Retrieves the filename: Stores the filename of the uploaded image in img_path.
- Prints the filename: Confirms successful upload by printing the name of the uploaded file.
- Uses PIL.Image.open(): Loads the uploaded image for further processing.
- Ensures correct format: Ensures the image is in the correct format before applying face detection and emotion analysis.
# Upload image
uploaded = files.upload()
img_path = list(uploaded.keys())[0]
print("Uploaded file:", img_path)

# Load the image
image = Image.open(img_path)
Image Enhancement for Improved Detection
- Contrast Enhancement: Increases contrast to highlight facial features.
- Sharpness Adjustment: Enhances edges for clearer facial structure.
- Brightness Adjustment: Improves visibility of facial details in darker images.
- Performance Enhancement: These adjustments help the face detection model perform better by making key features more distinguishable.
# 🔹 **Enhance image for better detection**
contrast = ImageEnhance.Contrast(image)
image = contrast.enhance(1.8)  # Increase contrast
sharpness = ImageEnhance.Sharpness(image)
image = sharpness.enhance(2.0)  # Sharpen edges
brightness = ImageEnhance.Brightness(image)
image = brightness.enhance(1.3)  # Increase brightness

# Convert to OpenCV format
img = np.array(image)

# Convert to grayscale for better detection
gray = cv2.cvtColor(img, cv2.COLOR_RGB2GRAY)
equalized = cv2.equalizeHist(gray)  # Histogram equalization
Face Detection and Emotion Analysis with MTCNN and Multiple Backends
Uses MTCNN for initial face detection and, if it fails, falls back to RetinaFace for improved detection. Multiple backends are utilized to ensure more accurate emotion analysis by comparing results from different models.
# 🔹 **Use MTCNN for face detection**
detector = MTCNN()
faces = detector.detect_faces(img)

if len(faces) == 0:
    print("⚠️ MTCNN couldn't detect a face. Trying RetinaFace...")
    try:
        result = DeepFace.analyze(img, actions=['emotion'], detector_backend='retinaface', enforce_detection=False)
    except Exception as e:
        print("🚨 No face detected. Try another image.")
        print("Error:", e)
        result = None
else:
    # 🔹 **Use Multiple Backends for Accuracy**
    results = {}
    backends = ['mtcnn', 'retinaface']

    for backend in backends:
        try:
            result = DeepFace.analyze(img, actions=['emotion'], detector_backend=backend, enforce_detection=False)
            results[backend] = result[0]['emotion']
        except Exception as e:
            print(f"Backend {backend} failed:", e)
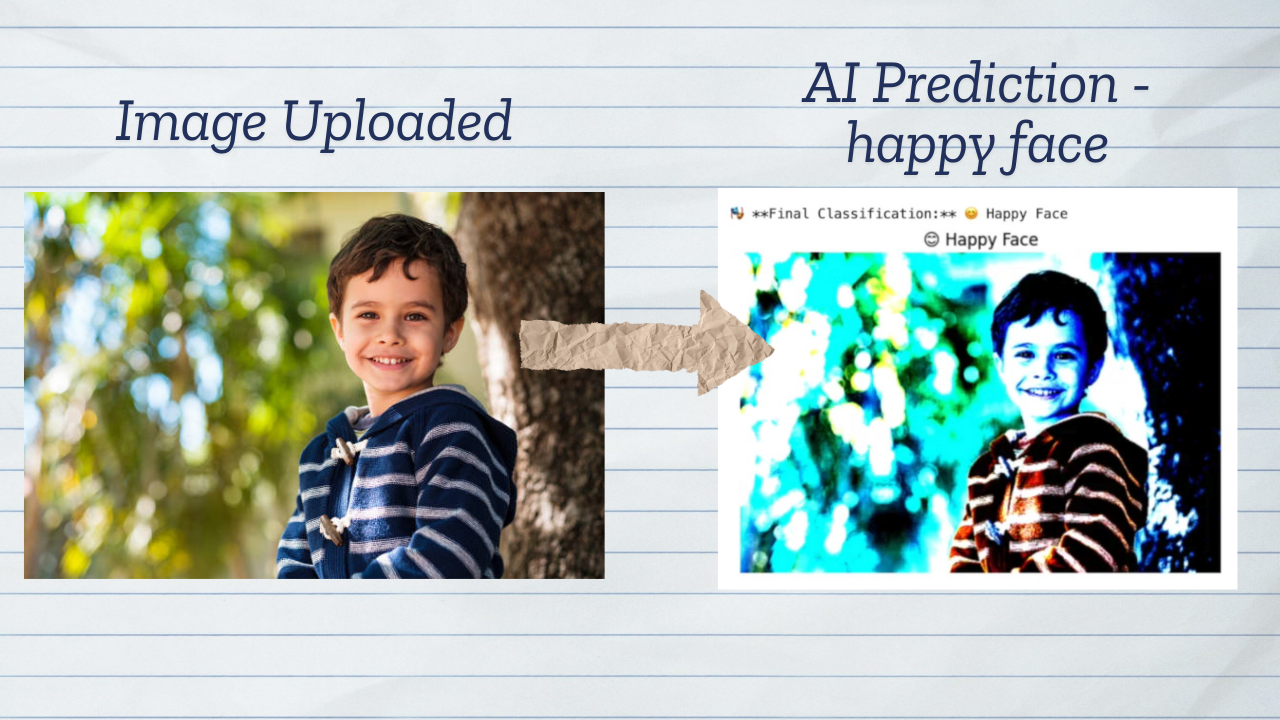
Filter for "Happy" Emotion and Final Classification
Calculates average "happy" scores from multiple emotion detection results and classifies the face as either "Happy" or "Not Happy" based on the comparison of "happy" to other emotions. The result is displayed both in text and on the image.
# 🔹 **Filter for "Happy" Emotion Only**
if results:
    avg_happy_score = 0
    avg_other_emotions = 0

    for backend, emotions in results.items():
        avg_happy_score += emotions.get("happy", 0)
        avg_other_emotions += sum(emotions.values()) - emotions.get("happy", 0)

    avg_happy_score /= len(results)
    avg_other_emotions /= len(results)

    # **Determine classification**
    is_happy = avg_happy_score > avg_other_emotions

    # Display result
    print("\n🎭 **Final Classification:**", "😊 Happy Face" if is_happy else "😐 Not Happy Face")

    # Show detected result on image
    plt.imshow(cv2.cvtColor(img, cv2.COLOR_RGB2BGR))
    plt.axis("off")
    plt.title("😊 Happy Face" if is_happy else "😐 Not Happy Face")
    plt.show()